Title: Hard Gel: The Ultimate Guide to Perfect, Long-Lasting Nails
Introduction: In the world of nail enhancements, hard gel is becoming increasingly popular due to its durability, versatility, and ability to create beautiful, long-lasting nails. Whether you’re a nail art enthusiast or just someone looking to strengthen your natural nails, hard gel can be the perfect solution. This guide will cover everything you need to know about hard gel, from how it works to the benefits and application process, ensuring you achieve perfect nails every time.
H2: What is Hard Gel?
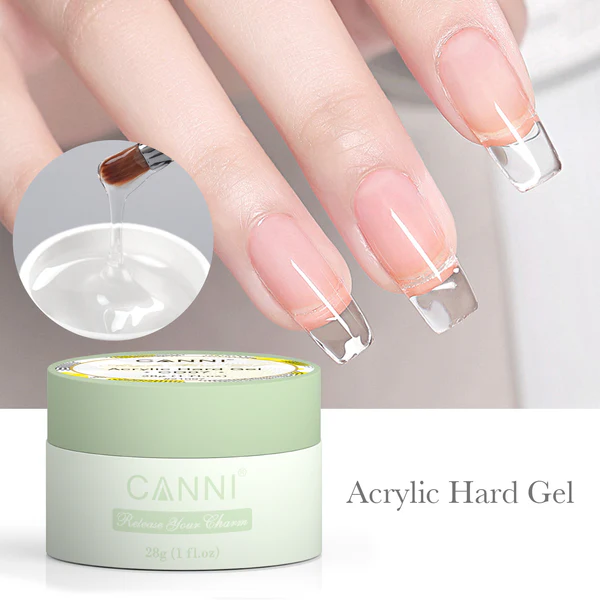
Hard gel is a type of gel used in nail extensions or as a protective layer for natural nails. It is a thick, durable gel formula that, when cured under UV or LED light, hardens into a strong, long-lasting finish. Unlike soft gel, which is more flexible and can be soaked off, hard gel is solid and typically requires filing to remove. This makes it ideal for creating nail extensions, adding strength to natural nails, or providing a long-lasting, polished look.
Hard gel is popular for its strength, as it is less prone to chipping or breaking compared to traditional nail polish. It also provides a glossy, high-shine finish that can last for weeks, making it an excellent choice for those looking for long-lasting nail enhancements.
H2: How Does Hard Gel Work?
Hard gel works by applying a layer of gel to the natural nail or nail extension form, then curing it under UV or LED light to harden it into a solid, durable surface. The gel is built up in layers to achieve the desired thickness, length, and shape. Once the gel has cured, it becomes strong and resistant to chips or cracks, providing a long-lasting and smooth finish.
The curing process involves exposing the gel to UV or LED light, which activates the chemicals within the gel and causes them to harden. This process takes only a few minutes and is essential to ensure the gel forms a solid bond with the nail.
H2: Benefits of Using Hard Gel
H3: Long-Lasting Durability
One of the most significant benefits of hard gel is its durability. Unlike traditional nail polish, which can chip and wear away over time, hard gel is designed to withstand daily wear and tear. It is strong, flexible, and resistant to chips, cracks, and scratches, making it ideal for those who want a long-lasting manicure or nail extensions.
H3: Natural-Looking and Glossy Finish
Hard gel provides a smooth, glossy finish that mimics the appearance of natural nails. When applied correctly, hard gel gives nails a flawless, shiny finish that doesn’t require additional topcoats or gloss. The natural shine and smooth surface make it a popular choice for both subtle and intricate nail designs.
H3: Customizable Nail Length and Shape
Hard gel is perfect for customizing the length and shape of your nails. Whether you want short, natural-looking nails or long, bold extensions, hard gel can be built up to your desired length and shape. It can also be used to create a variety of nail shapes, such as square, almond, or stiletto, providing endless possibilities for nail art and design.
H3: Strengthening Natural Nails
In addition to creating beautiful extensions, hard gel can also help strengthen natural nails. The gel forms a protective layer that helps shield the nails from damage and breakage. It provides additional support to weak or brittle nails, helping them grow stronger and healthier over time.
H2: How to Apply Hard Gel: Step-by-Step Guide
While applying hard gel can be done at home, it is recommended to visit a professional nail technician for the best results. However, if you want to try applying hard gel yourself, here is a step-by-step guide to help you achieve flawless nails.
H3: Step 1: Prepare Your Nails
The first step in applying hard gel is to properly prepare your nails. This includes cleaning, trimming, and filing your nails to the desired shape. Remove any old nail polish and push back your cuticles gently.
-
Clean your nails: Use a nail cleanser to remove oils and dirt from your nails to ensure proper adhesion of the gel.
-
Trim and file nails: Trim your nails to the desired length and shape. You can go for a classic square, almond, oval, or stiletto shape depending on your preference.
H3: Step 2: Apply a Base Coat
Next, apply a thin layer of base coat to your nails. The base coat is essential for creating a smooth surface for the gel to adhere to and helps to prevent lifting or peeling. Cure the base coat under UV or LED light according to the manufacturer’s instructions.
H3: Step 3: Apply the Hard Gel
Once the base coat is cured, apply a thin layer of hard gel to your nails. Start by brushing the gel onto the natural nail or nail form, making sure to cover the entire surface evenly. Hard gel can be built up in layers to achieve the desired thickness and length.
H3: Step 4: Cure Under UV/LED Light
After applying the first layer of gel, cure it under a UV or LED light for the recommended amount of time. The gel will harden and bond to your nails, creating a solid base for the next layer.
H3: Step 5: Build Up Layers
Repeat the process by adding additional layers of hard gel until you achieve the desired thickness and length. Be sure to cure each layer under the UV or LED light before applying the next.
H3: Step 6: Shape and File
Once the final layer is cured, use a nail file to shape the gel nails. This step is crucial for achieving the desired nail shape and for ensuring that the edges are smooth and even. After filing, you can buff the surface to create a smooth, glossy finish.
H3: Step 7: Apply a Top Coat
Finally, apply a top coat to seal in the gel and add extra shine to your nails. Cure the top coat under UV or LED light, and your hard gel nails will be ready to go.
H2: Hard Gel vs. Soft Gel: What’s the Difference?
While hard gel and soft gel share some similarities, there are key differences between the two that affect their application and durability.
H3: Hard Gel
-
Durability: Hard gel is strong and rigid, making it ideal for creating nail extensions and for reinforcing natural nails.
-
Removal: Hard gel requires filing to remove, which can be time-consuming but results in a more permanent finish.
-
Strength: Hard gel is ideal for those who need extra strength and durability in their nails.
H3: Soft Gel
-
Flexibility: Soft gel is more flexible than hard gel, making it a better option for those who want a more natural feel.
-
Removal: Soft gel can be soaked off, making the removal process faster and easier than hard gel.
-
Use: Soft gel is often used for temporary enhancements, such as gel polish or short nail extensions.
H2: Hard Gel Nail Art Ideas
Hard gel provides an excellent foundation for intricate nail art. Here are a few popular ideas you can try with hard gel nails:
H3: Ombre Effect
The ombre effect is one of the most popular nail art designs that looks stunning with hard gel. Blend two or more colors together to create a smooth gradient effect from the cuticle to the tip.
H3: Glitter Nails
Add a touch of glamour by incorporating glitter into your hard gel nails. You can apply glitter to all nails for a bold look or just to accentuate a few nails for a more subtle design.
H3: French Tips
Create a modern twist on the classic French manicure by using hard gel to form precise, crisp lines. You can go for a traditional white tip or experiment with bold colors like black, metallics, or pastels.
H3: 3D Nail Art
Hard gel is also great for creating 3D nail art. You can sculpt flowers, rhinestones, or other intricate designs to add dimension to your nails.
H2: Maintaining Hard Gel Nails
To keep your hard gel nails looking fresh and beautiful, regular maintenance is essential. Here are some tips to help you maintain your gel nails:
H3: Keep Nails Clean and Dry
Ensure that your nails are free from oils and dirt, as these can weaken the bond between the gel and your natural nails.
H3: Avoid Using Nails as Tools
Using your nails as tools can lead to chips and breaks. Always use proper tools for tasks like opening packages or scratching surfaces.
H3: Moisturize Regularly
Hydrate your nails and cuticles with a nourishing oil or cream to prevent dryness and cracking.
H2: Conclusion
Hard gel is the ultimate choice for anyone looking for durable, long-lasting, and beautifully polished nails. Whether you’re opting for extensions, enhancing your natural nails, or creating intricate nail art, hard gel offers endless possibilities for achieving stunning nails. With proper application and maintenance, hard gel nails can last for weeks, providing you with a flawless, high-shine finish that is perfect for any occasion.
By following the right techniques and tips in this guide, you’ll be able to master the art of hard gel nails and enjoy perfect nails that make a statement.


